

Notion
How to setup social connection with Notion
Overview
Adding social connection with Notion to your app with Clerk is simple - you only need to set the Client ID, Client Secret and Authorized redirect URI in your instance settings.
To make the development flow as smooth as possible, Clerk uses preconfigured shared OAuth credentials and redirect URIs for development instances - no other configuration is needed.
For production instances, you will need to generate your own Client ID and Client secret using your LinkedIn account.
The purpose of this guide is to help you create a Notion developer account and a Notion OAuth app - if you're looking for step-by-step instructions using Clerk to add social connection (OAuth) to your application, follow the Social connection (OAuth) guide.
Before you start
- You need to create a Clerk Application in your Clerk Dashboard. For more information, check out our Set up your application guide.
- You need to have a Notion developer account. To create one, click here.
Configuring Notion social connection
First, you need to create a new OAuth Notion app.
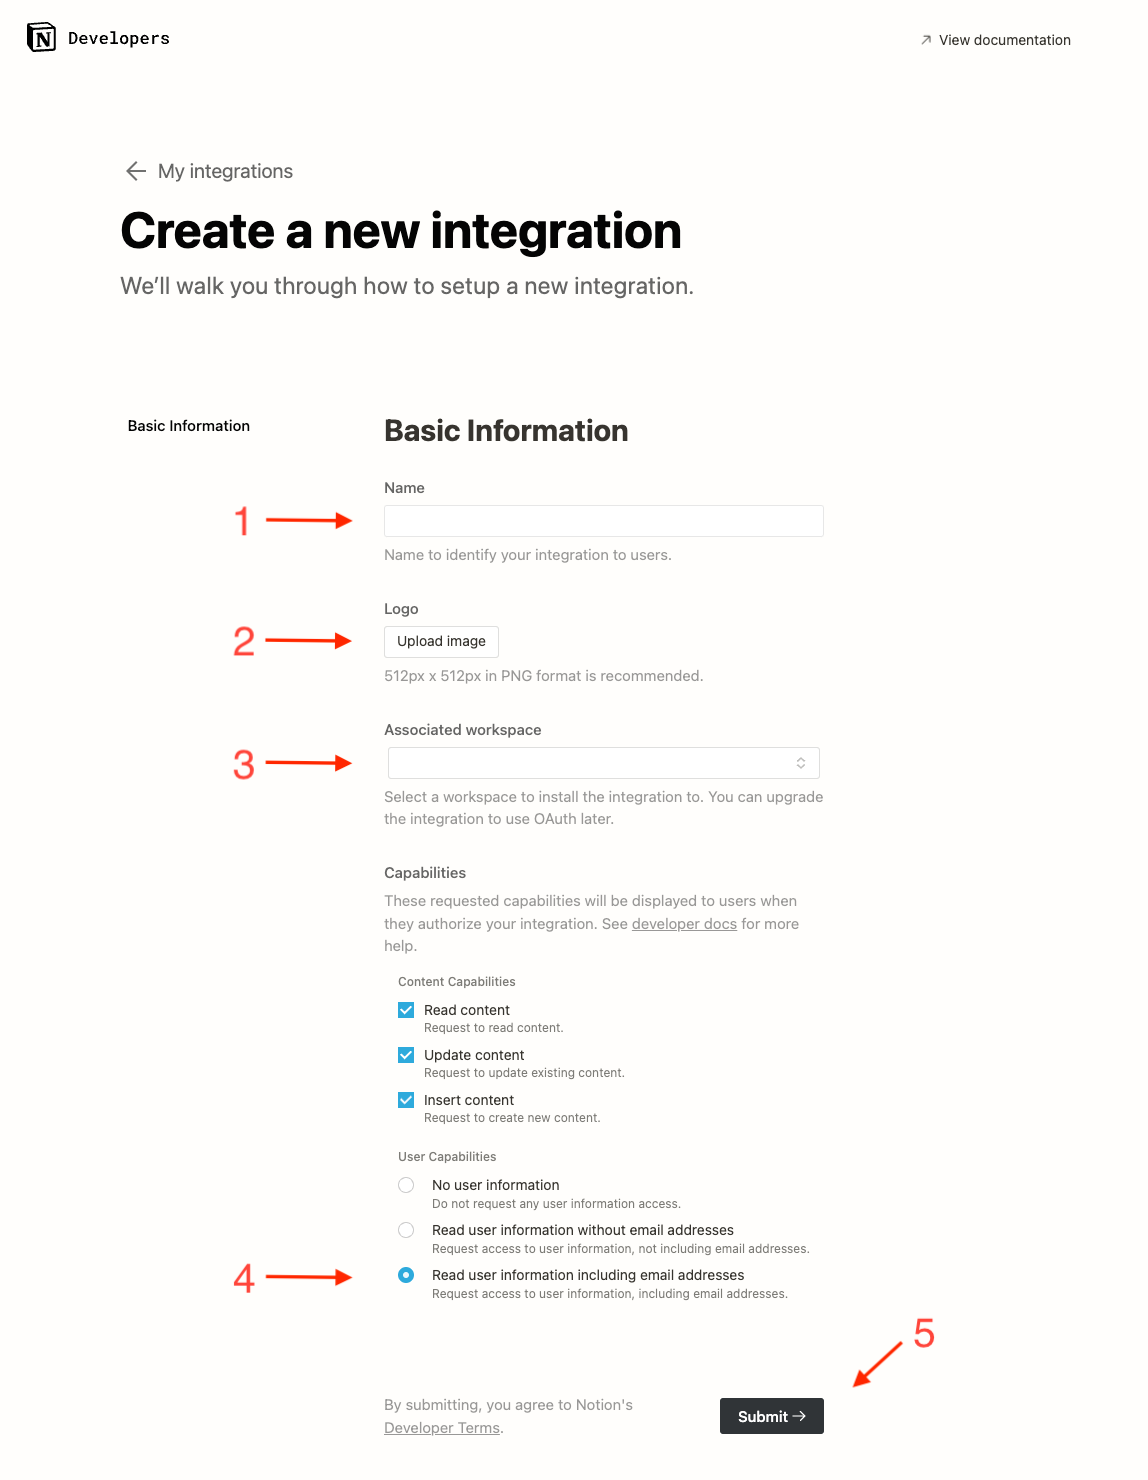
You need to set a name, a logo and associate a Notion workspace with it. Make sure you are also requesting the user email address along with the other information and click Submit.
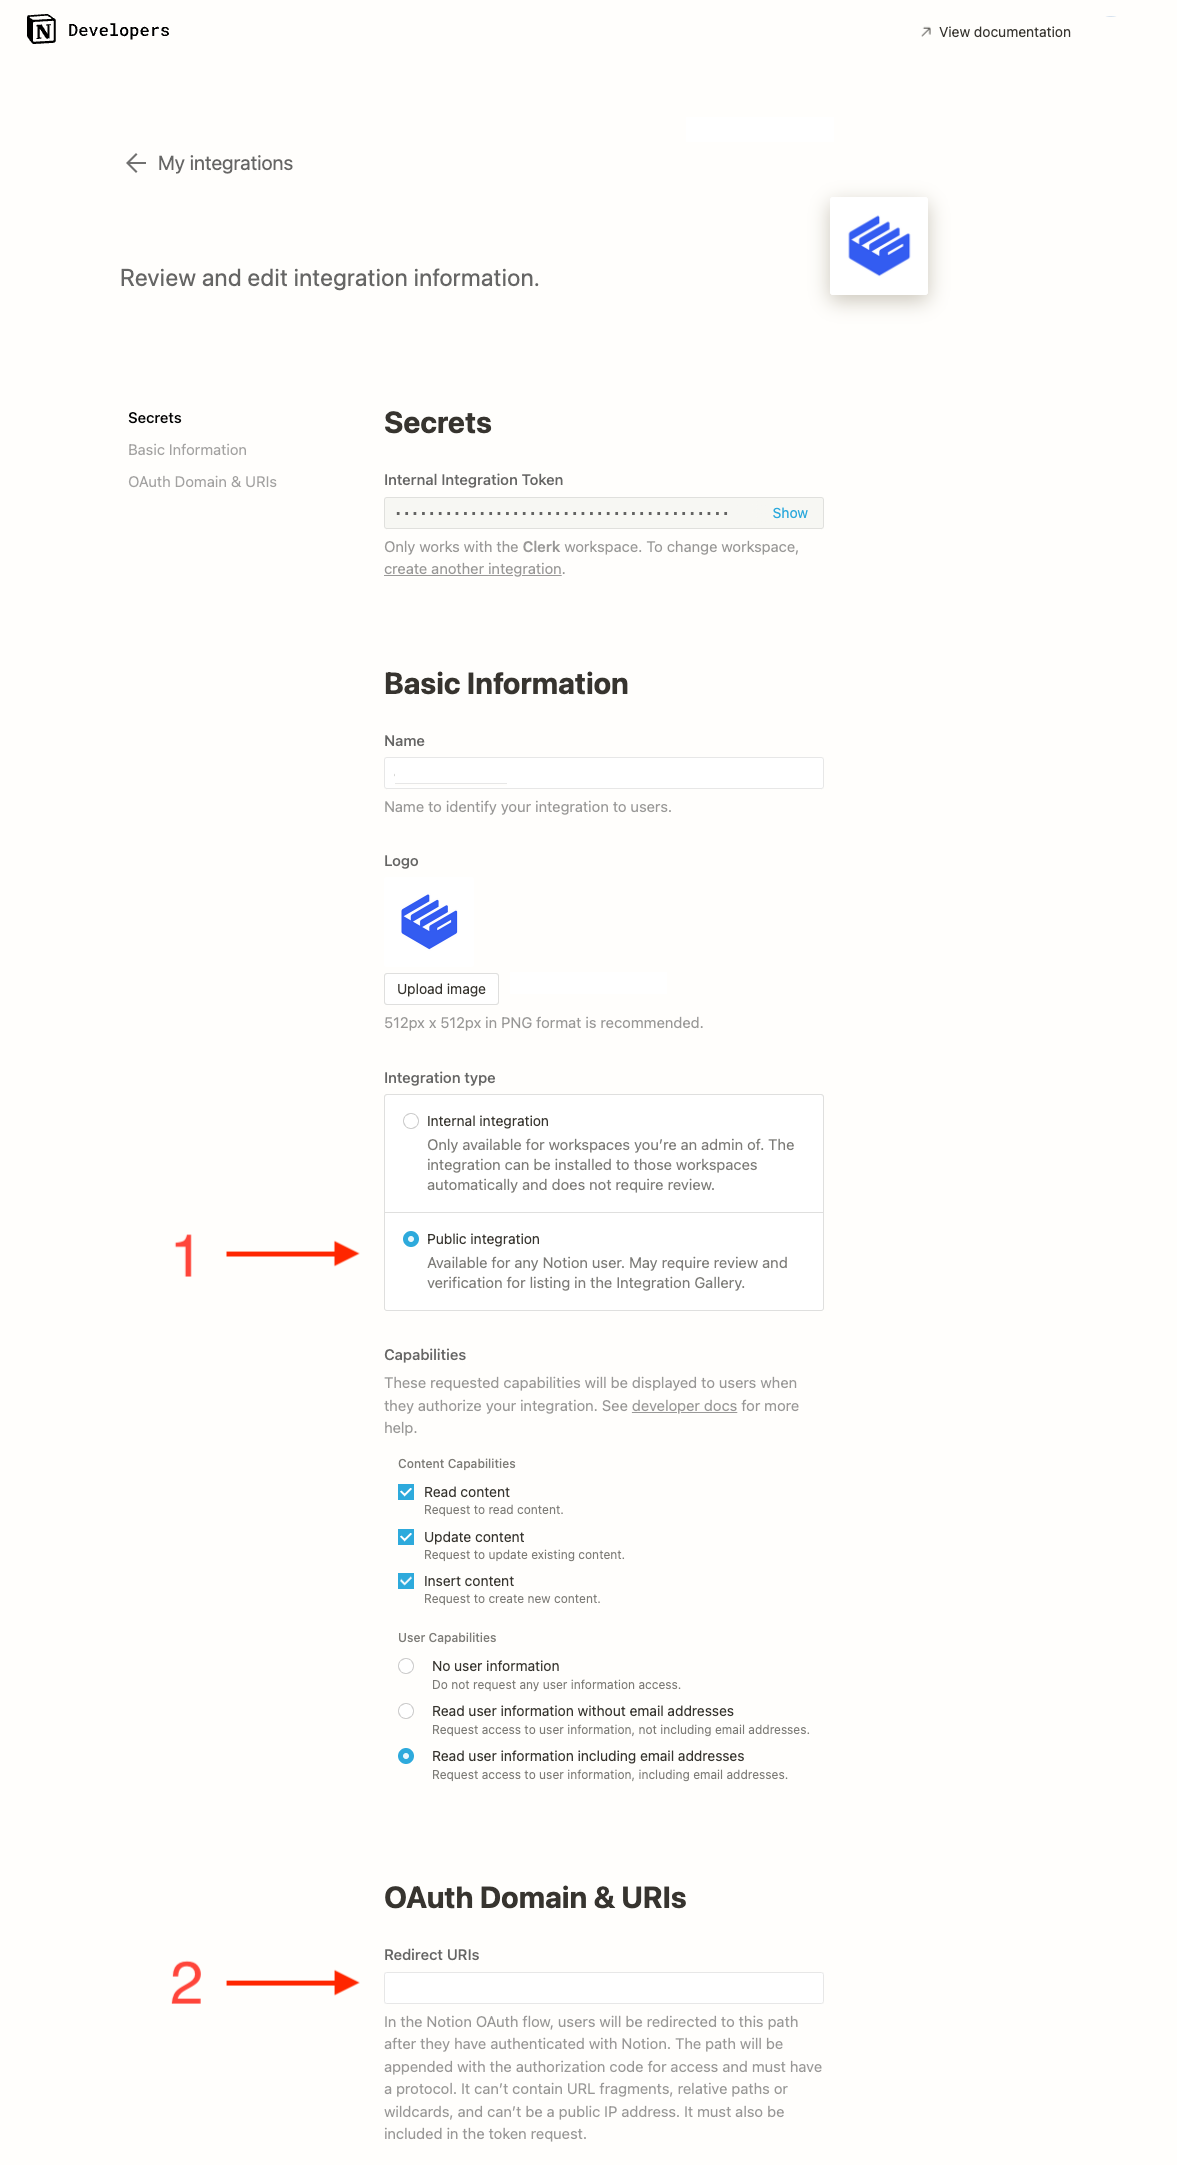
Go to the Social Connections page and enable Notion. In the modal that opened, ensure Use custom credentials is enabled and copy Authorized redirect URI. Paste the value into the Redirect URIs, as shown below, after changing the integration type to Public. Fill also any other information required from Notion and click Submit.
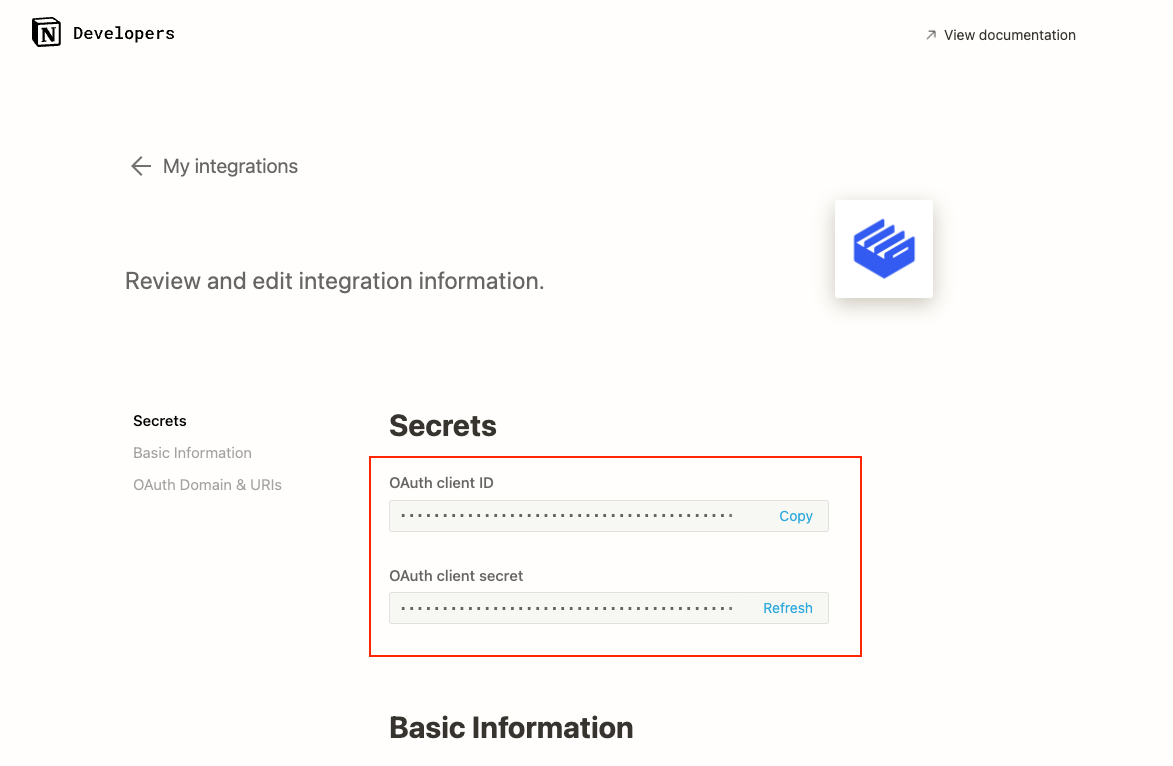
Copy the Client ID and Client secret as shown in the above image. Go back to the Clerk Dashboard and paste them into the respective fields.
Don't forget to click Apply in the Clerk dashboard. Social connection with Notion is now configured.