

Social Connections (OAuth)
Learn how to effortlessly add social connections to your application using popular OAuth providers like Google, Facebook, Github and more.
Overview
Clerk makes it easy to add social connection capabilities to your application. Social connections is designed to simplify the sign up and sign in processes for the end-user, resulting in higher conversion rates, a streamlined user data collection flow, and an overall better user experience.
Social connections provides better security than passwords and other long-lived knowledge-based secrets. With social connections, users gain frictionless access to your application by using their existing credentials from an OAuth provider (Google, Facebook, Twitter etc) without having to go through complicated registration flows.
When using social connections, the sign up and sign in flows are equivalent. If a user doesn't have an account and tries to sign in, an account will be made for them, and vice versa.
The easiest way to add social connections is by using our prebuilt Clerk Components. If you prefer a more custom solution, check out how to build a completely custom social connection flow.
Before you start
- You need to create a Clerk Application in your Clerk Dashboard. For more information, check out our Set up your application guide.
- You need to install Clerk React or ClerkJS to your application.
Configuration
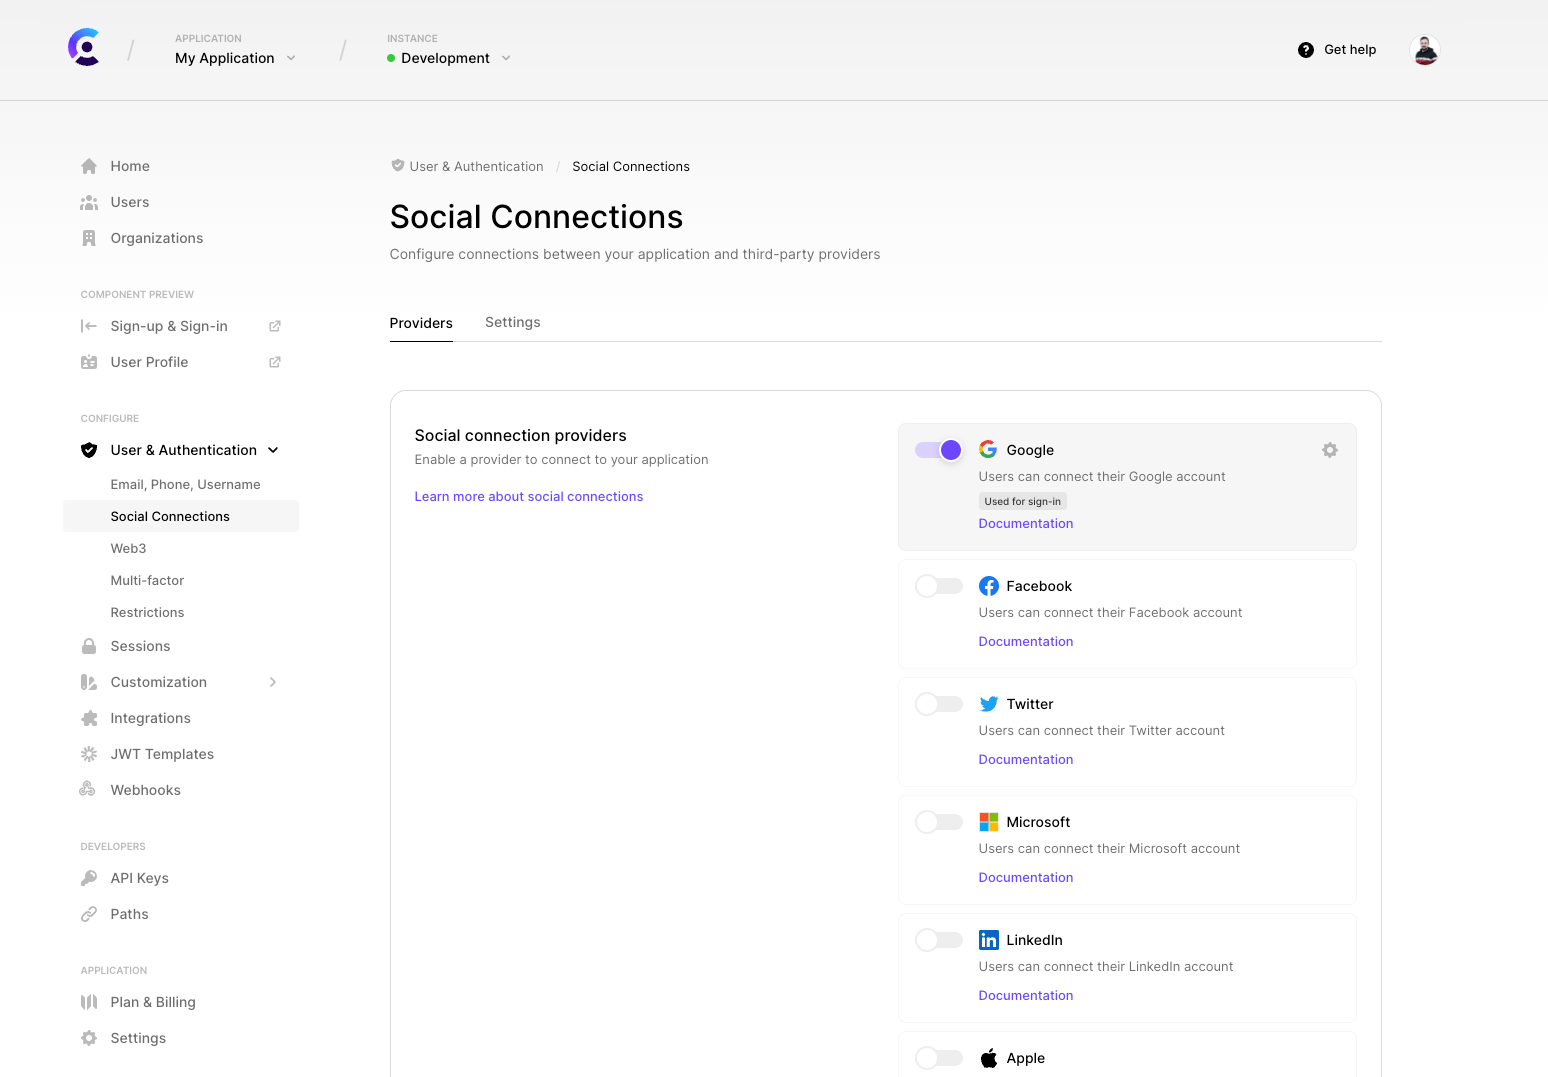
To enable a social connection provider, go to the Clerk Dashboard, select your Application,and navigate to User & Authentication➜ Social Connections. Social connection configuration consists of the following steps:
- Enable the providers you want to use.
- (production instances only) Enter your OAuth credentials (Client ID and Client Secret) for each provider
- (production instances only) Copy the
Authorized redirect URIfrom the Clerk Dashboard to the provider's app configuration.
Clerk supports multiple providers, but for the purposes of this guide we will enable social connection with Google.
We are constantly adding more providers. If you're interested in a provider we don't support yet, let us know!
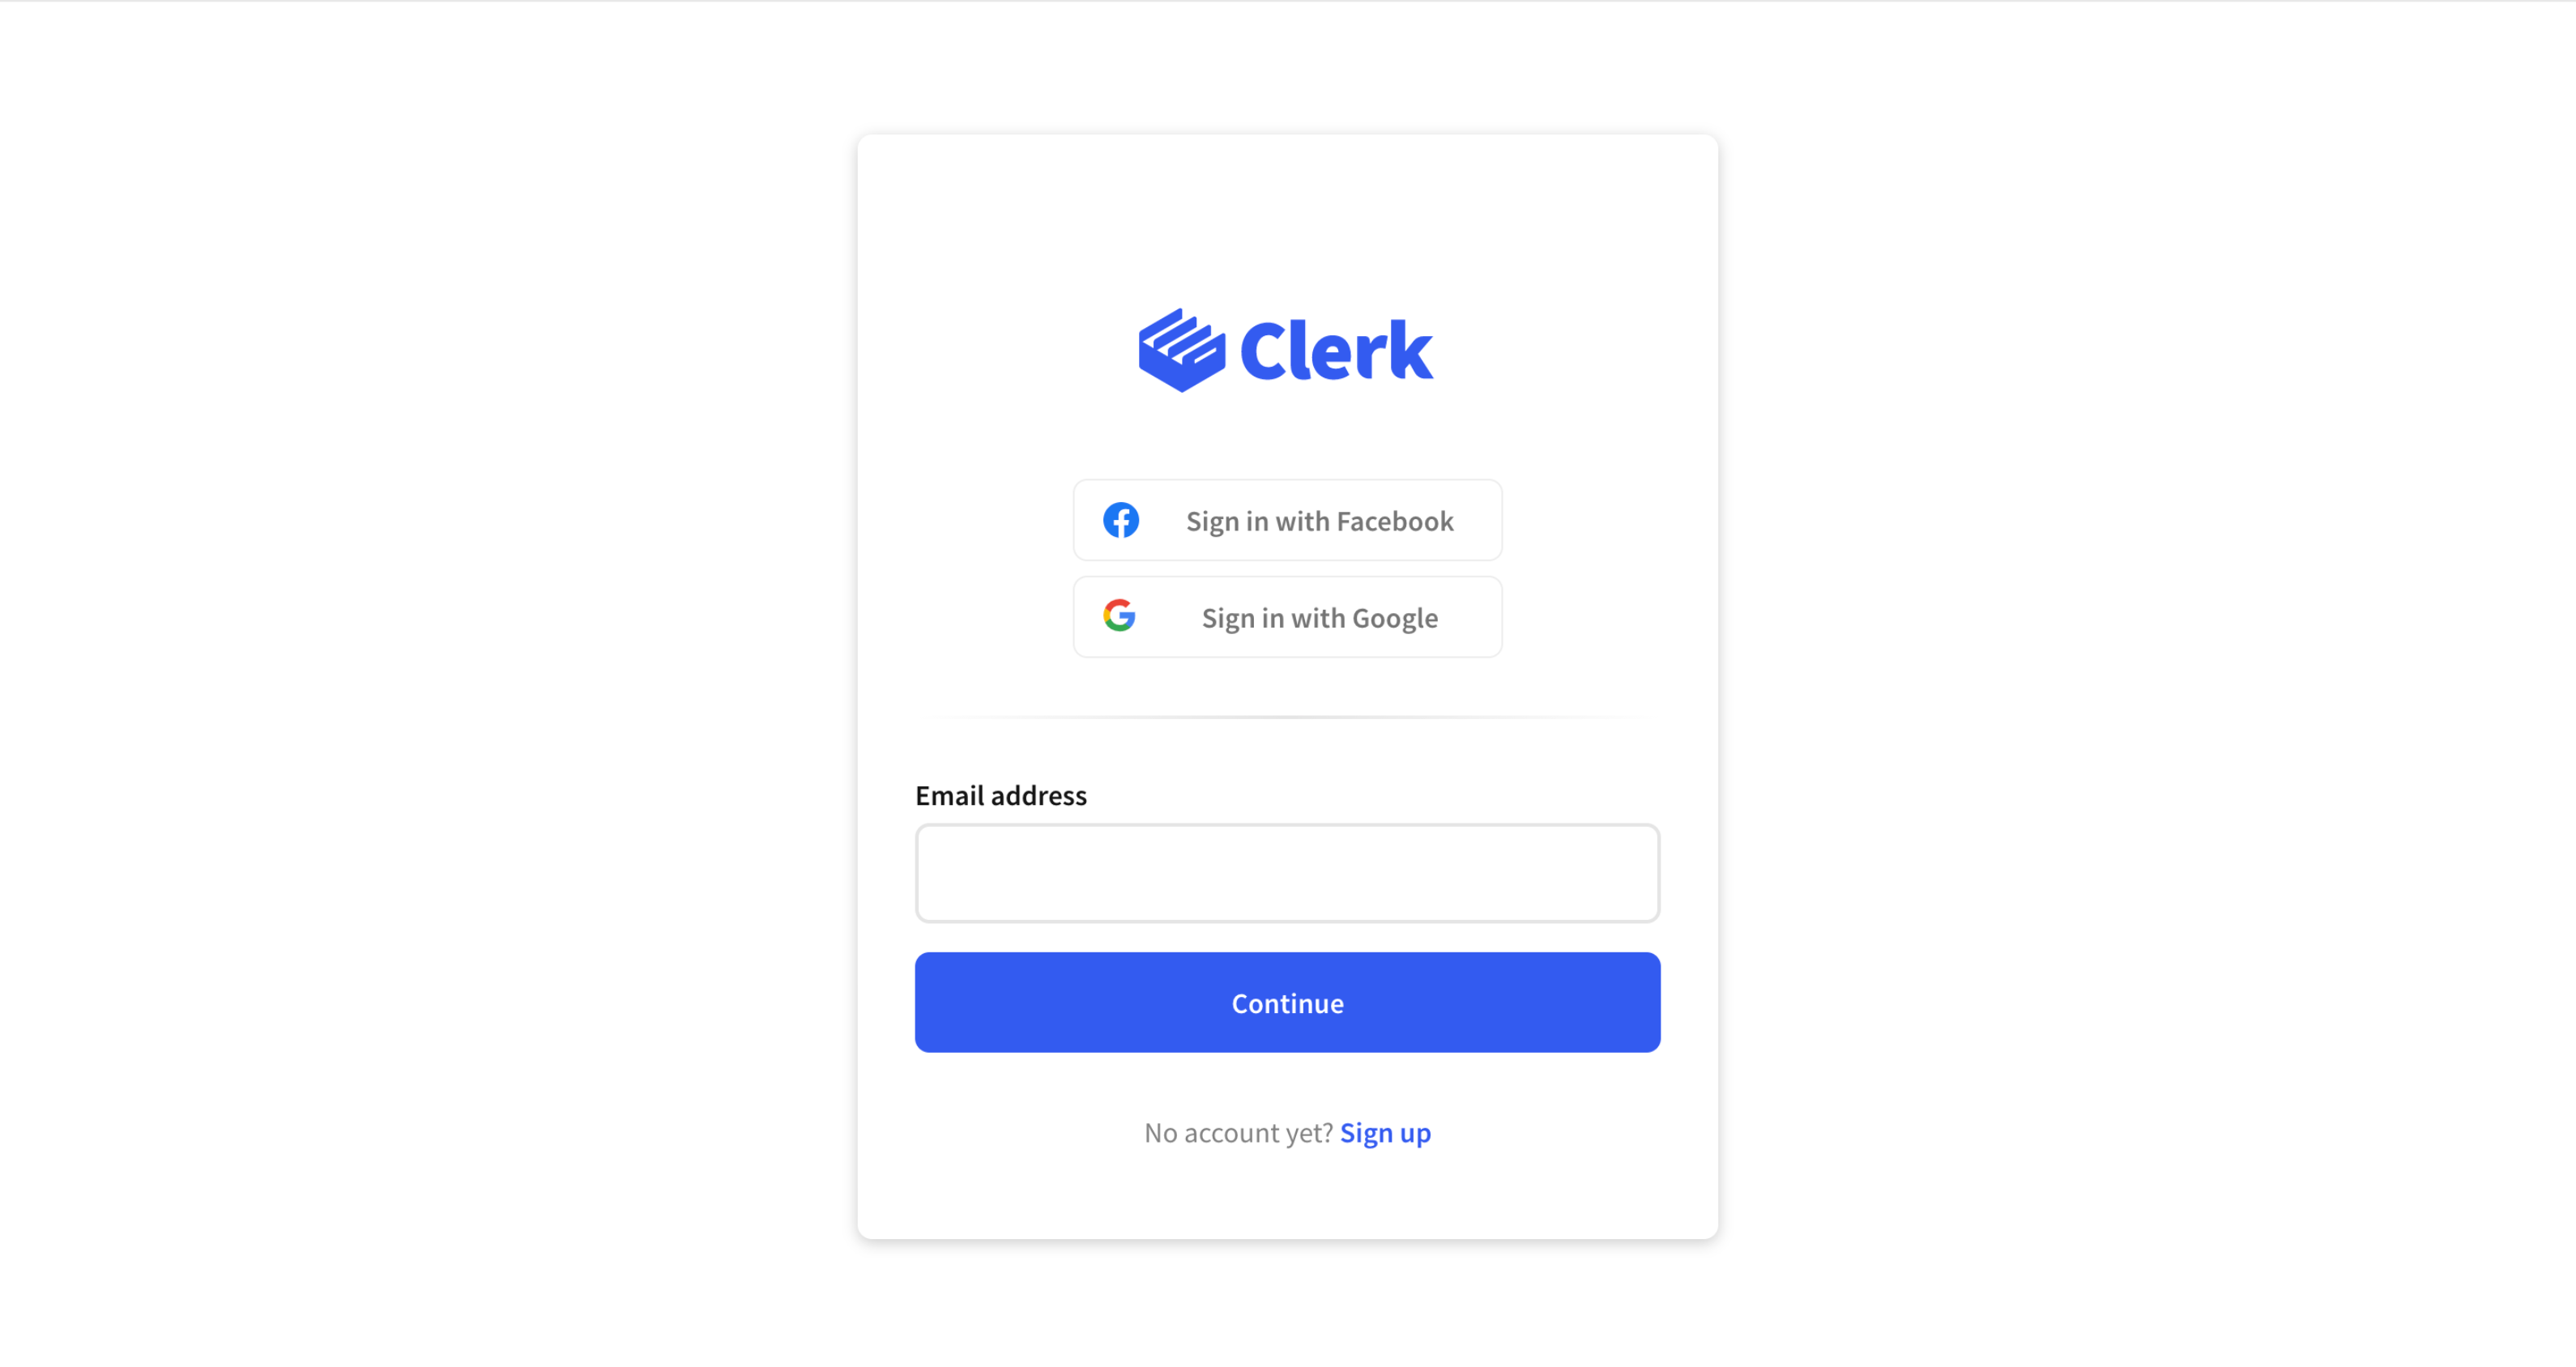
In development, after applying these changes, you're good to go! To make the development flow as smooth as possible, Clerk uses pre-configured shared OAuth credentials and redirect URIs. Navigate to your sign in or sign up page to see it in action 🙂
Shared OAuth credentials should not be treated as secure. For this reason, we don't allow them in production.
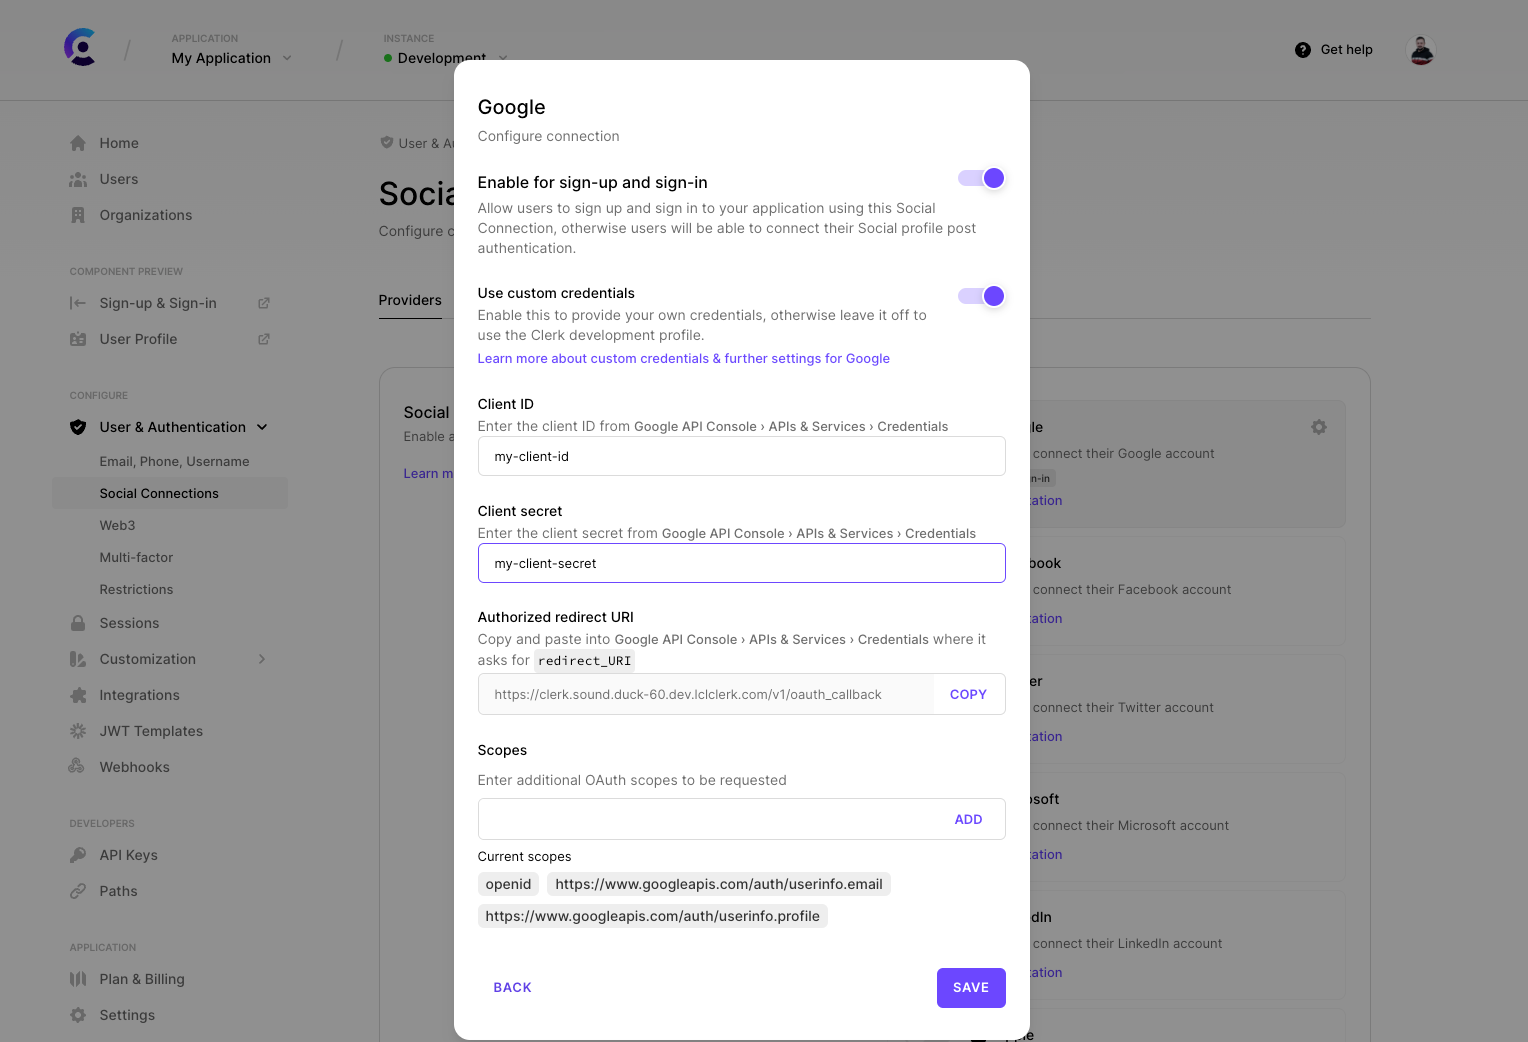
For production instances, you will need to create your own account with Google and generate your own Client ID and Client secret.
Finally, copy the Authorized redirect URI field and add it to the provider's app configuration dashboard. For more details, check out the following guides:
- How to set up social connection with Google
- How to set up social connection with Facebook
- How to set up social connection with Twitter
- How to set up social connection with TikTok
- How to set up social connection with Discord
- How to set up social connection with Twitch
- How to set up social connection with GitHub
- How to set up social connection with GitLab
- How to set up social connection with LinkedIn
- How to set up social connection with HubSpot
- How to set up social connection with Atlassian
- How to set up social connection with Bitbucket
- How to set up social connection with Dropbox
- How to set up social connection with Microsoft
- How to set up social connection with Notion
- How to set up social connection with Apple
- How to set up social connection with LINE
- How to set up social connection with Coinbase
- How to set up social connection with Spotify
- How to set up social connection with Box
- How to set up social connection with Xero
- How to set up social connection with Slack
- How to set up social connection with Linear
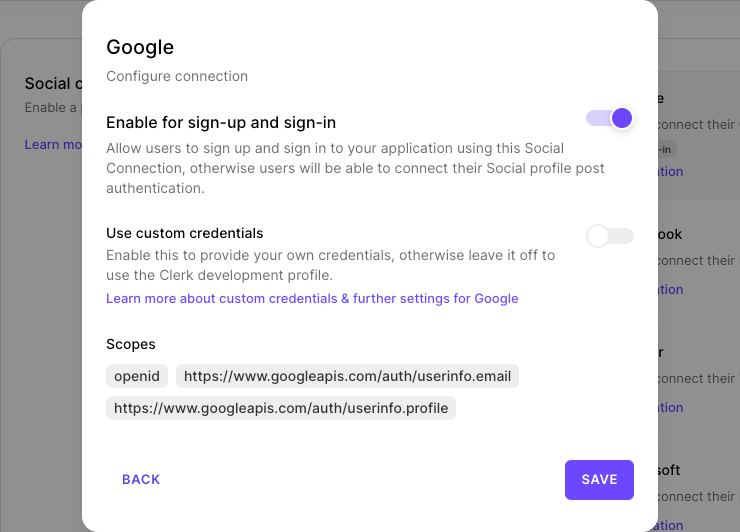
Configure additional OAuth scopes
For each provider, there is a set of pre-configured OAuth scopes that are absolutely necessary for authentication to work properly with Clerk. We call them base scopes.
On top of them, you can specify any additional scopes supported by the provider, by adding them to the "Scopes" field when configuring a custom profile.
Request additional OAuth scopes after Sign Up
With Clerk, you can request additional OAuth scopes, depending on your business needs, even after a user has signed up.
For Clerk Components, this is handled automatically by us. You only have to pass the additionalOAuthScopes prop in the <UserProfile/> component or the corresponding userProfileProp in the <UserButton /> component, with any additional OAuth scope you would like per provider.
Of course, you can achieve the same functionality implementing a custom flow, leveraging the corresponding methods of our SDKs
OAuth Access Token Wallet
You can retrieve the OAuth access tokens of your users via the OAuth Access Token Wallet endpoint that's available in the Clerk Backend API.
Using these tokens, you can query the respective OAuth providers for additional data of your users.
Clerk ensures that the OAuth Access Token will be always fresh so that you don't have to worry about OAuth Refresh Tokens anymore.
Add Social Connection after Sign Up
For each OAuth provider, you can choose whether will be available during sign-up and sign-in, or if the connection should be made later.
This is especially useful for applications that prefer to connect third-parties after the fact. For example, a Github connection can be made after sign-up if an application wants to read repository data.
After sign-up, Connections can be made through our <UserProfile/> component, or with a custom flow.
Connecting to OAuth providers while signed in
When signed in, one can connect to further OAuth providers as well, there is no need to perform another sign-up.
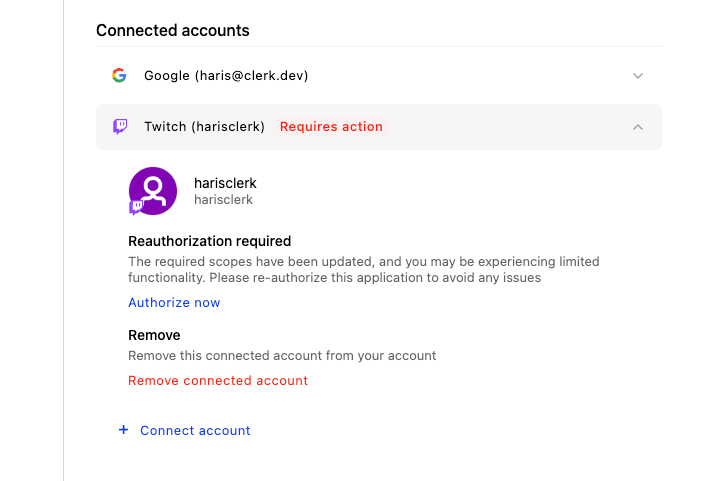
When using Clerk hosted pages, on the /user/account/social-accounts path one can see which providers the user has already connected to and which ones they can still connect to.
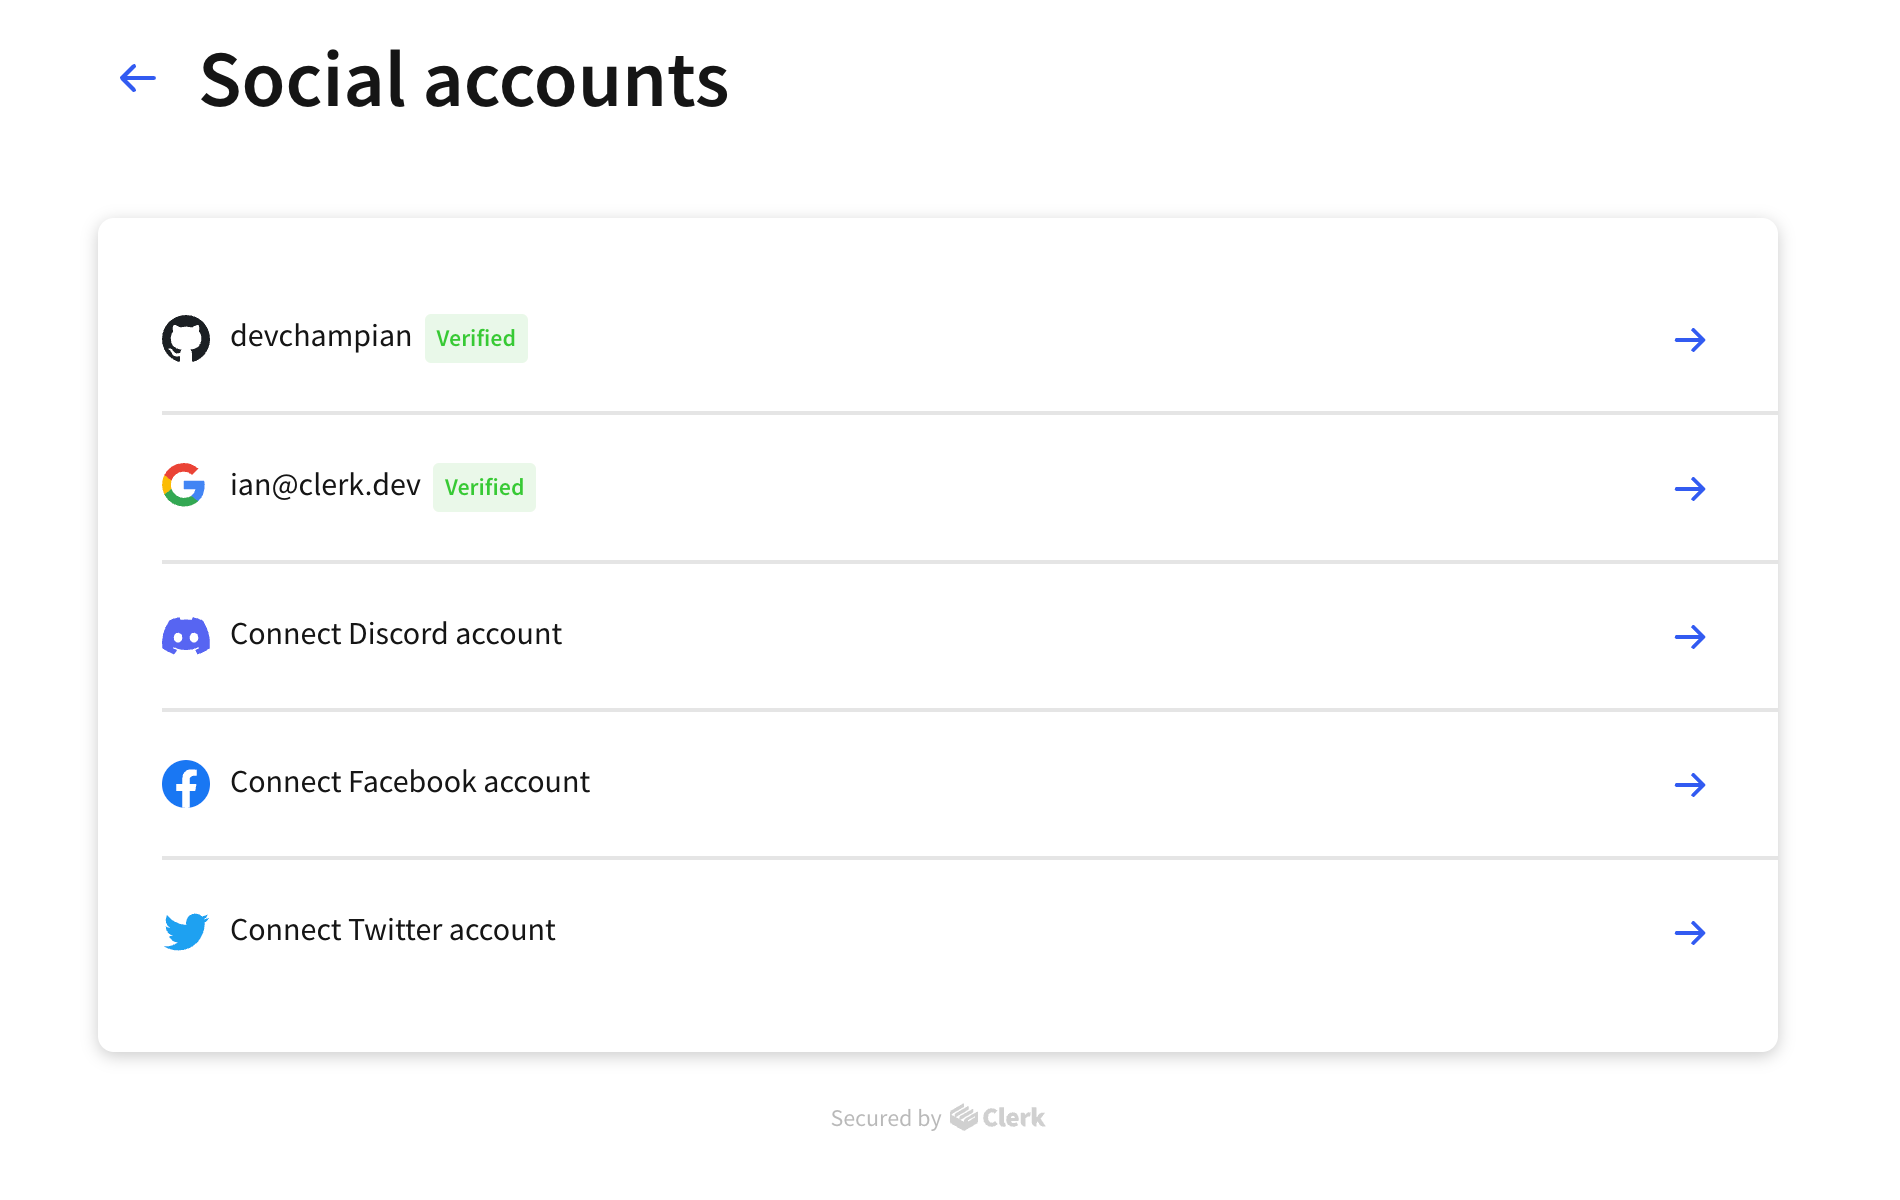
In the example above we can see that the user has already connected their GitHub & Google accounts, while they can also connect their Discord & Facebook accounts if they wish to.
Clicking on an already connected acccount will take the user to a detailed view of said acccount, whereas clicking on an unconnected provider will initiate the connection process by redirecting to the provider for authentication.
After completing the connection (or after cancelling, should someone change their mind), the user will be taken back to the same page.
Note that when signing up using different OAuth providers Clerk can only associate the accounts to the same user if the verified email returned by the provider is the same.
When connecting to an OAuth provider from the User Profile page, Clerk knows this concerns the currently signed in user, so there is no requirement for the email the provider returns to match the email of the current user.
Using Clerk Components
To further customize your sign up and sign in pages, you can use Clerk Components to easily add authentication anywhere. Doing so will let you add a custom background, modify CSS, and much more. In fact, Clerk's own sign up and sign in pages follow this approach.